Fender Squier Series Stratocaster Guitar Neck Mods and Repair
My Reintroduction to Guitar Neck Mods and Repair…
After somewhere between 15 and 20 years since I tried my hand at guitar mods and repairs I decided it was time to hop back on the ol’ horsie and give her another ride. My first stab at it would be with guitar neck mods and repair. I had all these grand ideas about how I would record each upgrade and post them to YouTube…but mostly what happened is I didn’t really know what I was doing so the video and my workmanship weren’t good. I’m not going to try to edit that video together so instead I’m going to give mini-reviews of each of the upgrades I made and how it went.
My goal for this guitar was to make it a much better playing guitar without breaking the bank and get my feet wet in guitar mods and repair. I wanted to keep the punk rock guitar them I started 20 years ago but make it play and sound like an adult guitar. I’m not getting paid by any company, sponsored, or free gear, so this is just what I picked out, wanted to try, and can afford.
Checkout my previous post about this guitar here
Neck Mods and Repairs
Dragonfire Guitar Vintage Kluson Style Tuning Keys – $17.95 free shipping
Cost: $17.95 free shipping
Difficulty: 2 out of 5
Rating: 4 out of 5 stars
Tools Required:
- #1 Phillips Screwdriver
- Ruler or Level or Straight Edge
- Pencil or Marker
- 1″ Painters Tape
- Drill
- Small drill bit
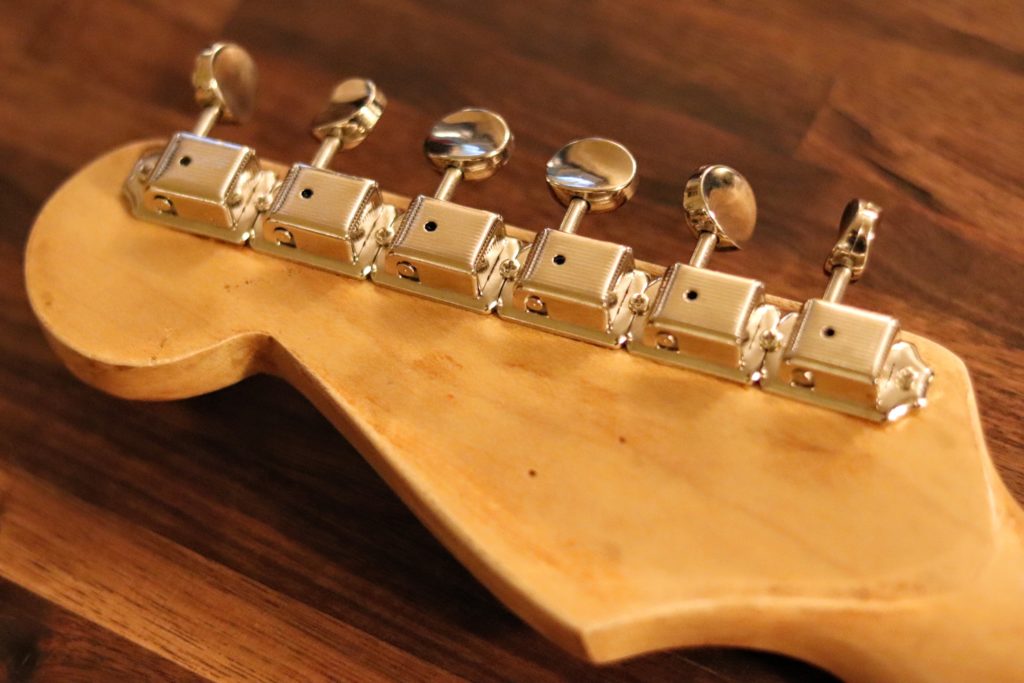 These tuning keys are the MVP for this build. For anyone with one of these old Squier Series guitars or any guitar with the diamond shaped tuning keys, this is the first thing I would upgrade. For $18 bucks you’re getting much better tuning, your guitar will stay in tune much longer, and your guitar will be easier to tune. There are much better tuners on the market, but you can’t beat them for the price if you have worse tuners and don’t want to spend more than $20 bucks. This guitar didn’t need any additional bushings. The bushings that came with the tuners would have worked, but I stuck with the original ones. My only complaint is that one of the tuning pegs had a stray bit of metal that Dragonfire could have caught before they sent them out to me. I had to spend a bit of time cutting it off and sanding it out.
They were pretty easy to install. I pulled out the old tuners and put the new tuners in their place, leveling the tuners with a ruler, and marking where I would drill the pilot holes with a pencil. Next I used one of the smaller drill bits (one much smaller than the screws I would be installing) to drill the pilot holes. Then I marked the drill bit by wrapping tape around the bit where I wanted to stop drilling so I didn’t go too deep. I tried to fill in the original holes with maple wood filler, but it didn’t end up looking that great. Only one hole is visible once these are installed.
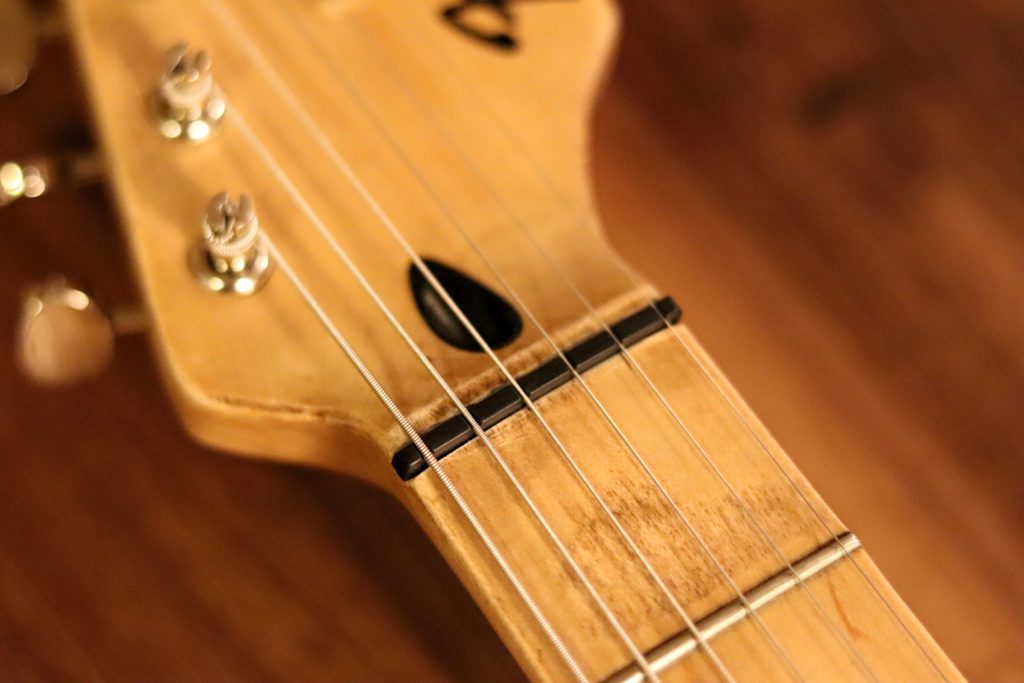
Fender American Series String Guides
 Cost: $7.92 free Prime shipping
Difficulty: 2 out of 5
Rating: 4 out of 5 stars
Tools Required:
- #1 Phillips Screwdriver
- Ruler / Level / Straight Edge
- Pencil / Sharpie Marker
- 1″ Painters Tape
- Drill
- Small drill bit
 These string trees look much nicer than the original trees. They seem like they would put less stress on the strings if you’re a maniac on the whammy bar. This upgrade is inexpensive but if you’re not comfortable drilling holes in your guitar, I would skip this one.
Believe it or not, you will have to drill a new hole for an anchor post. I made sure the string tree was lined up correctly then penciled in where the hole needed to be drilled. I did this with the strings on and by sticking the anchor post in the original hole and then tracing the hole for the new string tree. Then I drilled the hole with a drill approximately the same diameter as the anchor. My guitar only had one string tree originally so I only replaced the one tree, but I think I will add a second tree some time in the future.
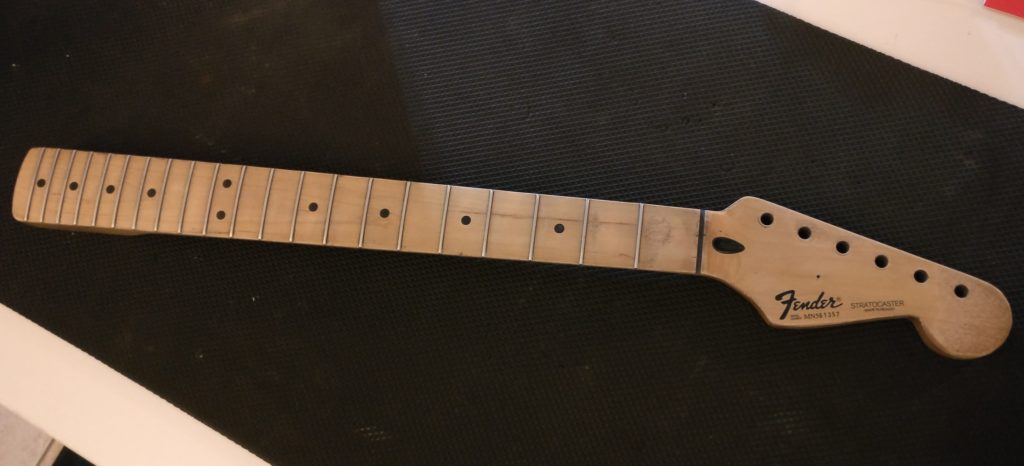
Graphtech Strat Style Flat Bottom 42mm PT-5042-00 Nut
Cost: $11.99 Prime Shipping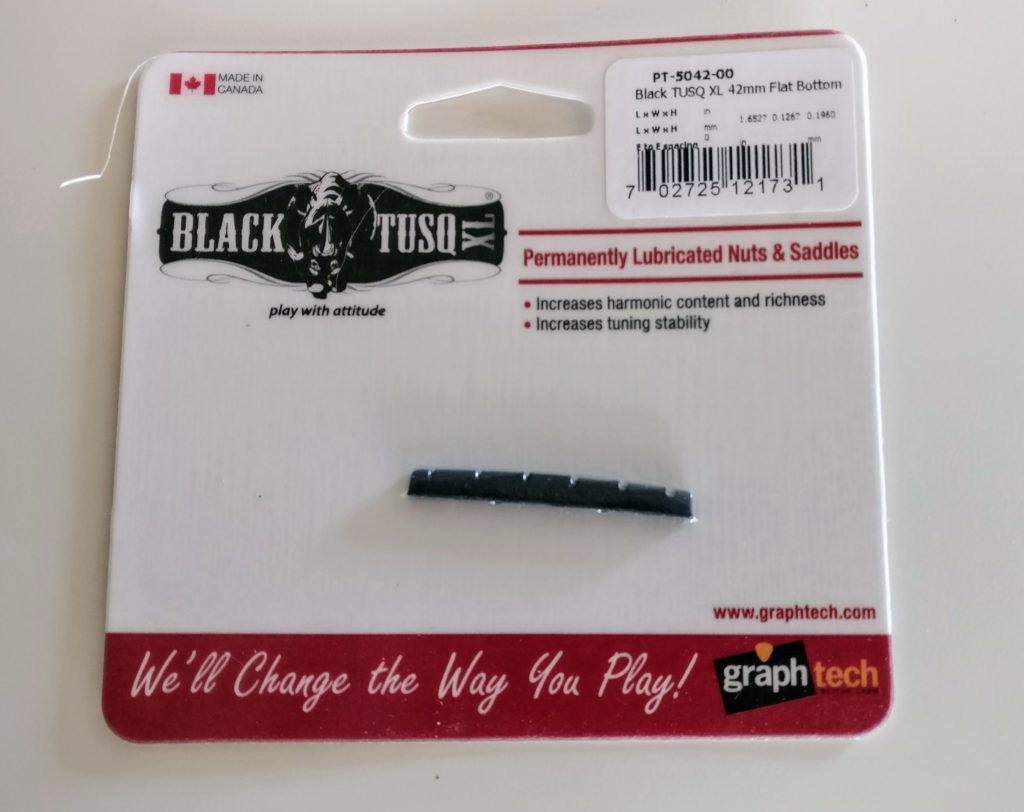
Difficulty: 2 out of 5
Rating: 4 out of 5 stars
Tools Required:
 This was the most difficult part of this build because the nut I ordered didn’t fit and I decided to file the fretboard to make it fit. Total amateur mistake. Do not file your fretboard! File the nut! Or don’t be a cheapass and order a new nut of you screwed up on the first one.
Anyways, it’s actually really easy to file these GraphTech nuts down to size if you need to. For this Strat I should have ordered a curved bottom nut but with some sandpaper and by comparing it to the original nut, I was able to get it shaved down to the right size.
Final thought, shave your nuts, not your wood!
Truss rod Adjustment
Cost: Free! Or very expensive if you screw it up!
Difficulty: 2 out of 5
Rating: 5 out of 5 stars
Tools Required:
There is nothing more under rated than learning how to adjust your own truss rod. First of all you should adjust it based on how YOU play, not how some guitar tech prefers it. Second off, I remember my bass teacher telling me I destroyed my bass after I took off all of the strings. Guitar shop owners would warn to never adjust your own guitar, you’ll twist the neck! I call bologna!
With that said, you really can screw up your guitar so watch a million YouTube videos, read as much as you can, start with a cheap guitar, take your time, and be carefull. You’ll get the hang of it! And it’s more likely you learn how to set your neck bow than it is you’ll destroy a guitar neck.
Fret Treatment
Cost: Free! Or very expensive if you screw it up!
Difficulty: 2 out of 5
Rating: 5 out of 5 stars
Tools Required:
- Sharpie Marker
- 1″ Painters Tape
- String Action Ruler Gauge
- Sanding Sponge
- Fret Crowning Tool
- Steel Wool
Like adjusting truss rods, I learned how to deal with frets by watching a ton of YouTube videos. You can do this too!
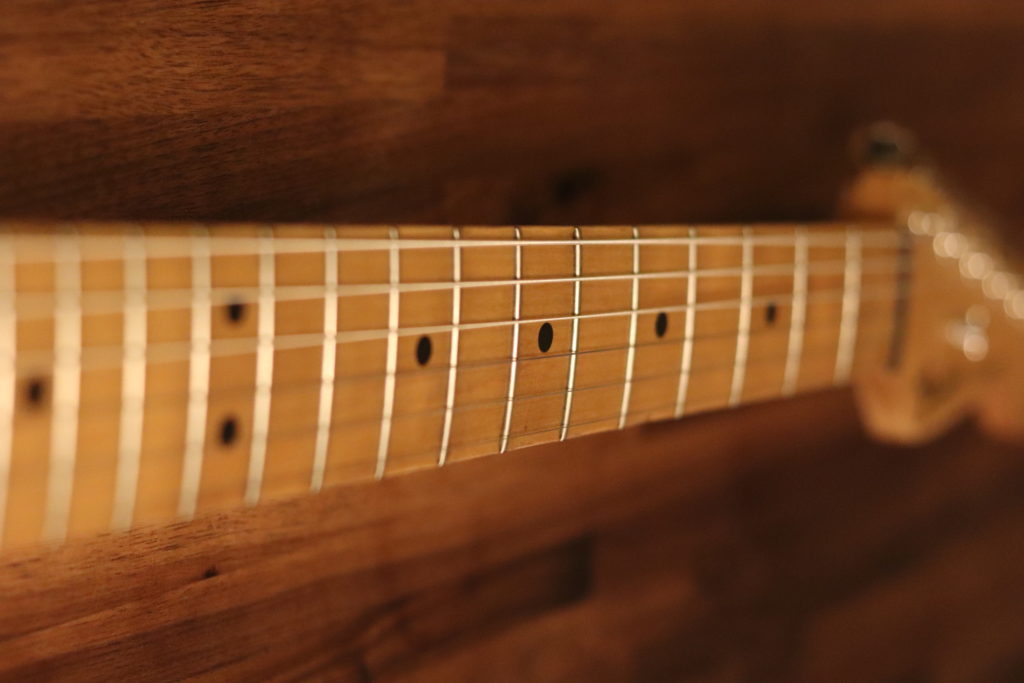
So this guitar had a little fret sprout and unevenness. Fret sprout is when you feel the frets start to protrude from the top and bottom of the fretboard. It can be really significant on inexpensive guitars and feel like it will slice your hands up on some really bad guitars. Unevenness can be measured by rocking your string action ruler gauge between 3 frets. You set the ruler so that the end is perpendicular to the frets and aligned perfectly center and then try to rock it. You will be able to detect an uneven or high fret by how it rocks.
I started this repair by taping the fretboard with painter’s tape, basically covering any wood area that may come into contact with the sand paper. Then I mark the top of all of the frets with the Sharpie. Next I perform the rocking test on each fret, marking high frets on the painters tape. I use a sanding sponge to sand every fret evenly and remeasure the uneven frets and sand until they are even. Lastly, I use a fret crowning tool to reshape the top of each fret. And finish with one final polish with steel wool.
Stain & Laquer
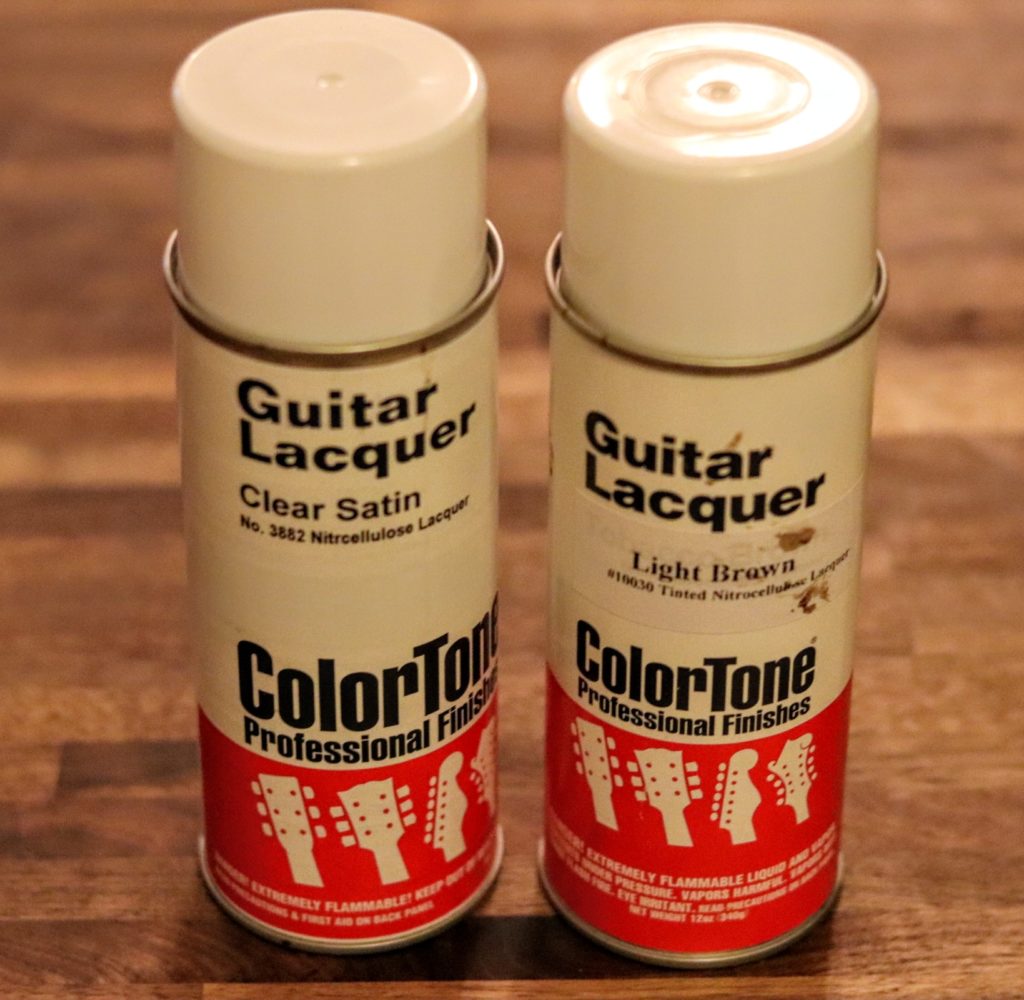 Cost: About $35 for laquers
Difficulty: 3 out of 5
Rating: 2 out of 5
Tools Required:
- Sanding Mouse
- Fine 240 Grit sandpaper
- ColorTone Clear Satin Laquer
- ColorTone Light Brown Lacquer (I don’t recommend using this to stain a guitar neck)
- Scouring Pads
I honestly like how my neck turned out. It fits the crappy punk rock aesthetic and has a DIY relic feel to it. With that said, I don’t think I would do this for anyone, even if they paid me, and a whole lot of things went wrong.
First off, I begun this part of the project by sanding of course. I thought it would be easy to sand off whatever sealant was on there but I totally sanded it unevenly so some parts of the neck didn’t even take to stain and other parts sucked it up. So makes sure you know how to sand stuff. Next, the light brown stain lacquer sprayed on way darker than I expected, not like roasted maple at all. More like a burnt ‘smore…well not black but maybe graham cracker brown. The can I had sprayed on splotchy and dribbled all over, it was a mess, spitting brown tar all over the place. After I sprayed it on as evenly as possible, I decided it looked like shit and used my wife’s fingernail polish remover to undo my work. It did leave behind a slightly brown/grey, strange staining, which is what is left today. I dig it.
Next I sprayed a layer of clear satin laquer, waited for it to dry, buffed it with a scouring pad. Sprayed another layer and repeated. I did this 6 or 7 times. The neck came out feeling awesome and satiny.
Guitar Mods and Repair To Be Continued…
Well that’s it for now about my guitar neck mods and repair I did on the Fender Strat. Check back later for an update on the Guitar Body Mods and Repair.