
Fender Mustang Amp Broken Power Switch
How to Fix a Guitar Amp Broken Power Switch
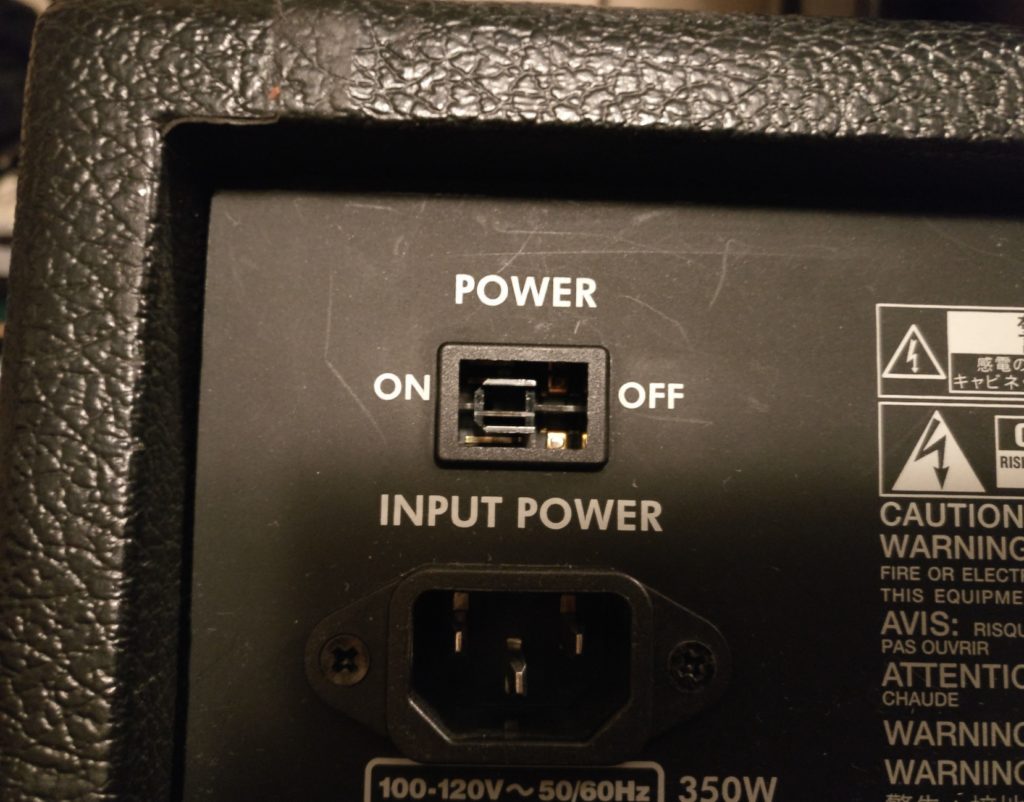 I came across a Fender Mustang IV amp with a broken power switch. The owner said it worked great before the power switch came apart but he wasn’t technical enough to repair it and neither was Guitar Center…I guess they don’t specialize in simple power switch repairs, but whatever. For the price, I took a shot and was able to figure out how to fix it two different ways which I will share with you.
You can apply these basic instructions to any amp with a rocker style switch…or possibly any switch that you replace.
Quick disclaimer: I’m not responsible for anyone injuring themselves. If you can’t handle electricity, consider this blog post casual reading for you to enjoy learning how I fixed my amp. Seriously, don’t try it if you don’t feel qualified to handle soldering irons or high voltage.
Super Glue Fix
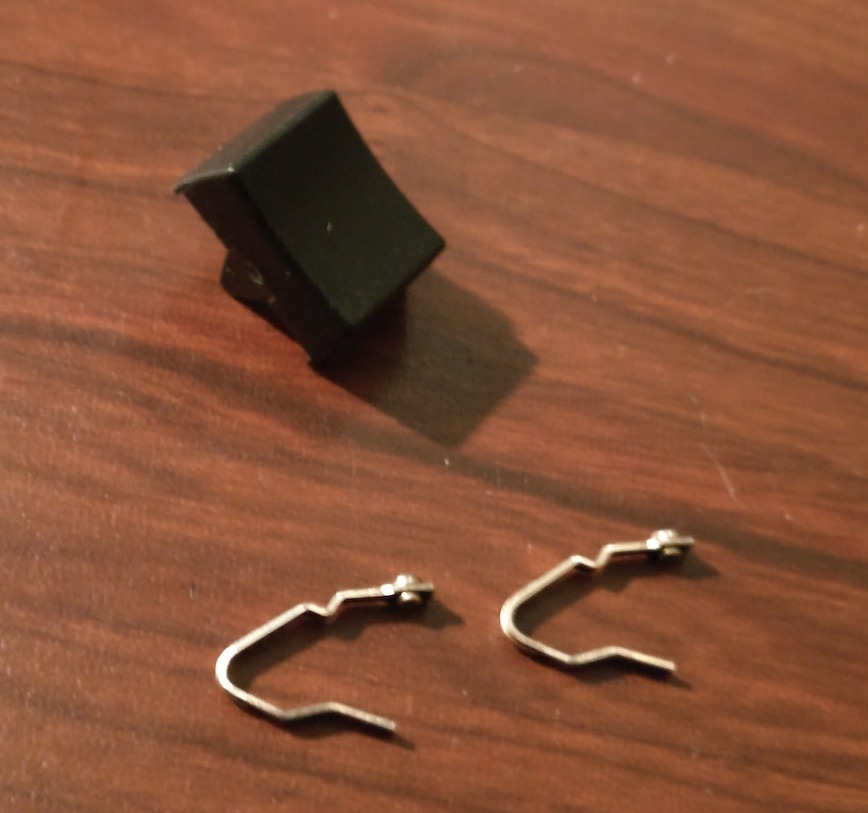 Alright, so this is a pretty good option if you still have all the parts and pieces of the broken power switch. You should still have 2 metal U shaped connection pieces and the plastic rocker switch.
Tools:
Parts:
Steps:
- Lay the amp on it’s face.
- Carefully insert the U shaped metal pieces back into the switch housing. (See the picture)
- Push the plastic rocker piece back into the switch housing.
- Feel for the switch clicking when toggling the rocker.
- Put the switch into the ON position and plug the amp in. You may need to get a friend to help coordinate this.
- Keep holding the rocker in place:
- If it doesn’t power up, continue trying to get the switch rebuilt correctly.
- If the amp powers up continue to the next step.
- Super glue the switch in place, do not super glue your finger to the switch.
- Continue holding the rocker in place for 1 to 2 minutes or until the glue has dried.
- Connect a power strip to your cable and use the switch on it to turn your amp ON and OFF.
Broken Power Switch Replacement
So if you’re the kinda person that want’s to do stuff right, this is the place for you! Especially if fixing a broken power switch is the thing you want to do right! This method will require you to own more tools and buy some parts.
Tools:
Parts:
Steps:
- Removed necessary screws (All screws are machine style, not wood screws)
- 2 Screws on top of the amp
- 2 Handle screws
- 3 Screws under the head unit, towards the back side of the amp
- Carefully pull the head out from the back of the cabinet. Watch out for the large heat sink and knobs that make it a little tricky to get out, but you can do it!
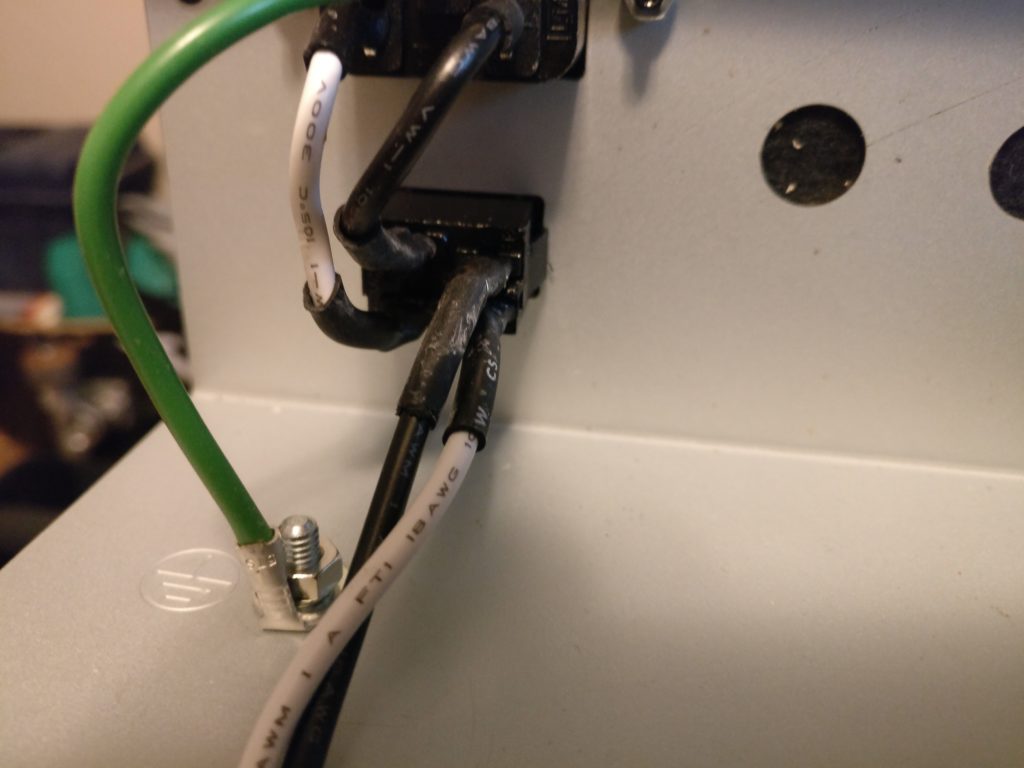
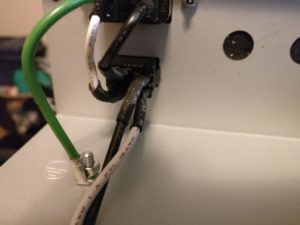 Take a picture of the wiring…or if you forget see my picture.
- Pull the heat shrink tubing off of the connections.
- Unsolder each of the wires.
- Add female disconnects to each of the wire end. Make sure to crimp them on really well and test that the disconnects stay on the wire.
- Pry out the original broken power switch with a flat head screw driver. Get it started by pushing in the butterfly flaps with the needle nose pliers.
- Install the new switch.
- Reconnect all the wires.
- Put the amp back together.
- Plug it in and fire it up!
Don’t Like Words?
If you don’t want to read stuff, just check out my video! I show ya how to do stuff there!